This article is a comprehensive guide to taking digitals by yourself to submit to modeling agencies. Modeling digitals (also known as modeling polaroids) are the most important part of your submission to agencies. They are simple images with little to no makeup, Agents will delete your application if your digitals are not clear.
Digitals are just one factor that help you to get signed. Other factors include applying at the right time, including relevant information, and in some cases, following up on your application. Check out this article for a complete guide on how to get signed as quickly as possible.
What You’ll Need for Model Digitals
A camera: For quick digitals requested for a casting, I use my iPhone 12. For digitals I’m submitting with an agency application, I use my Sony ZV-E 10 camera. Both work perfectly fine.
A tripod: You need a tripod that can extend to the height of your face.
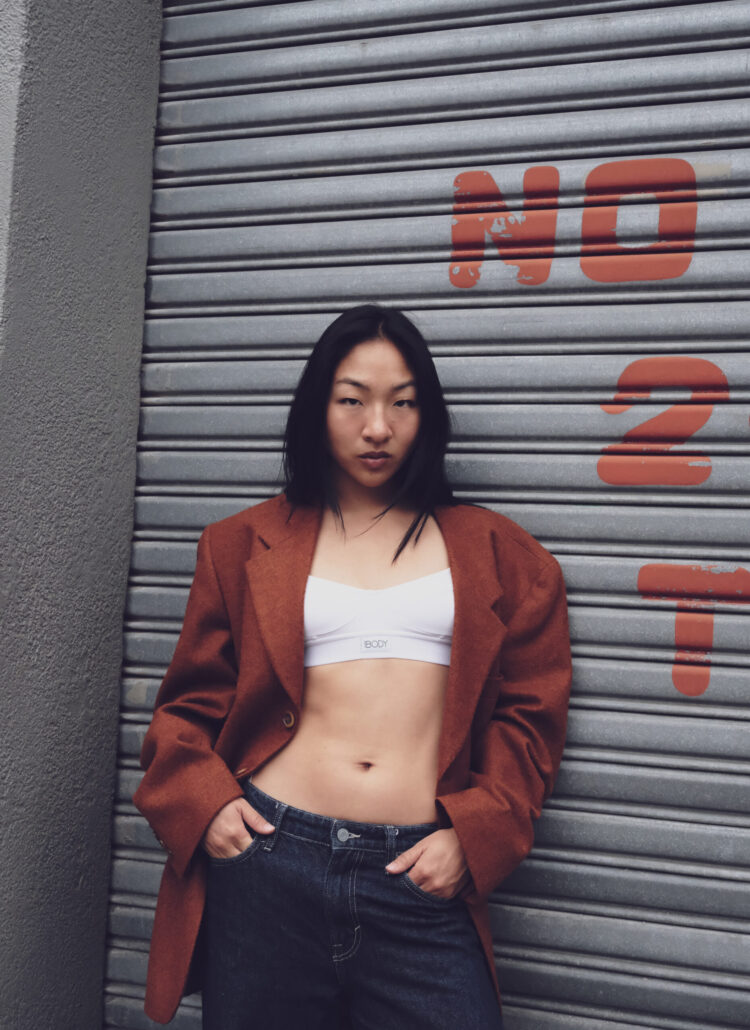
Digitals outfit: Black form-fitting top, jeans, and heels.
Natural lighting: Bright natural light is the most flattering for digitals. Take your model digitals in front of a window, or outside in the shade.
A clean background: A plain white wall is preferable, and if you don’t have access to that in your home, find a well lit parking garage or plain wall in your neighborhood.
Images you Need for Digitals
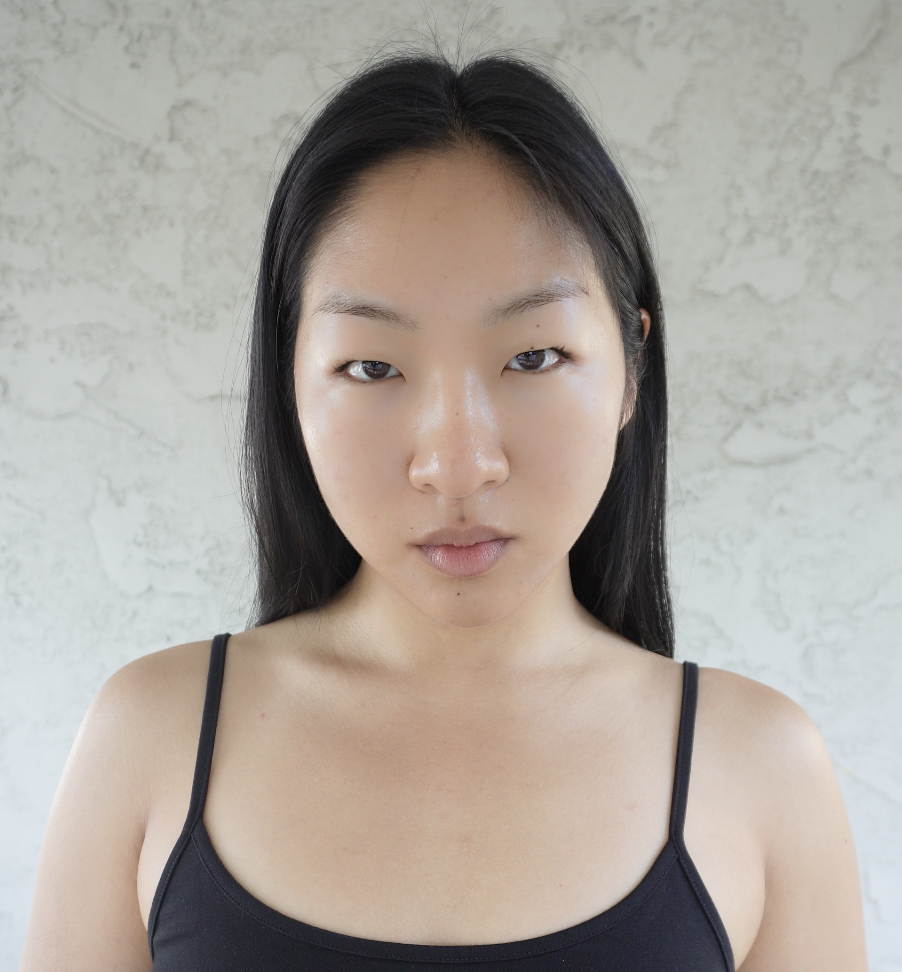
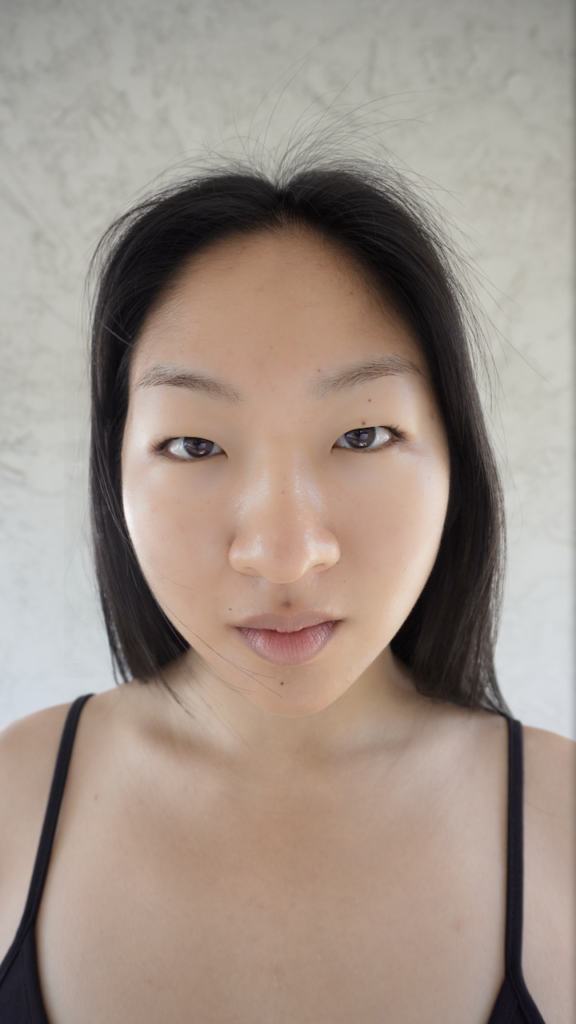
Headshot: This is a tightly framed shot from your chest to the top of your head. In my digitals, I have curled my eyelashes, applied a bit of concealer to cover my acne hyperpigmentation, and lip balm.
Midshot: This is a shot from mid thigh to top of your head. Sometimes this is referred to as a three-quarter shot–confusing with the three quarter profile, I know. I refer to it as a midshot.
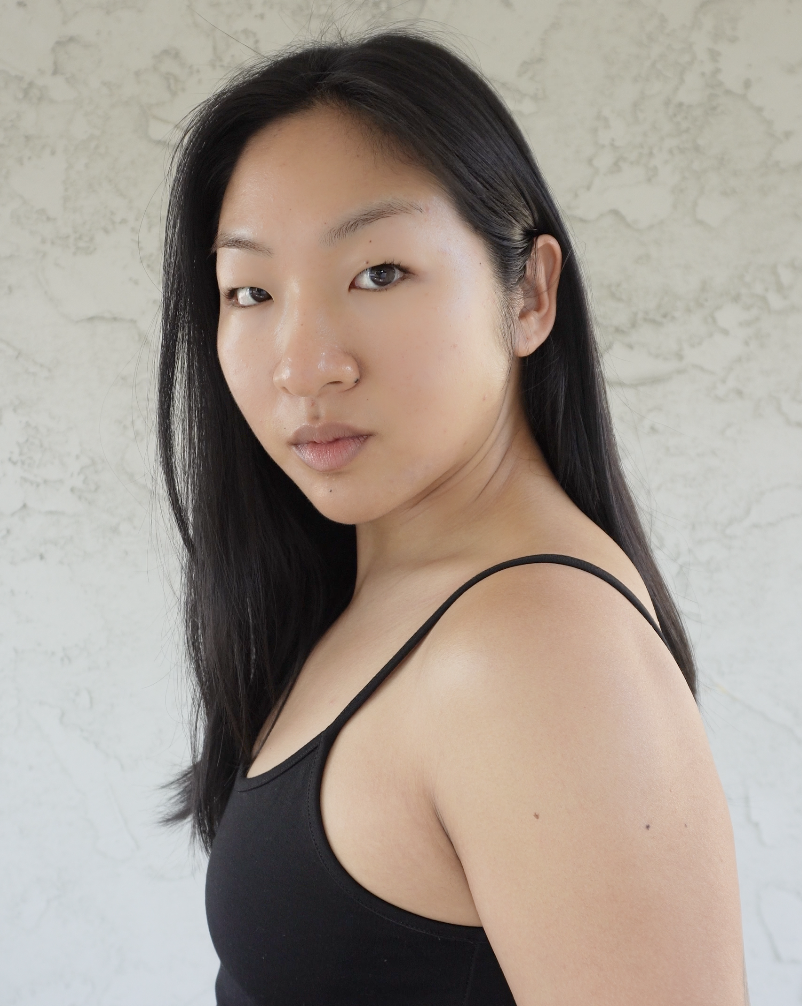
Three-quarter profile: This is a headshot showing the side of your face, with both eyes still in view.
Profile Shot: This is a shot showing the full side of your face. Sometimes you’ll be requested for just a headshot profile, sometimes you’ll get requested for a full body profile.
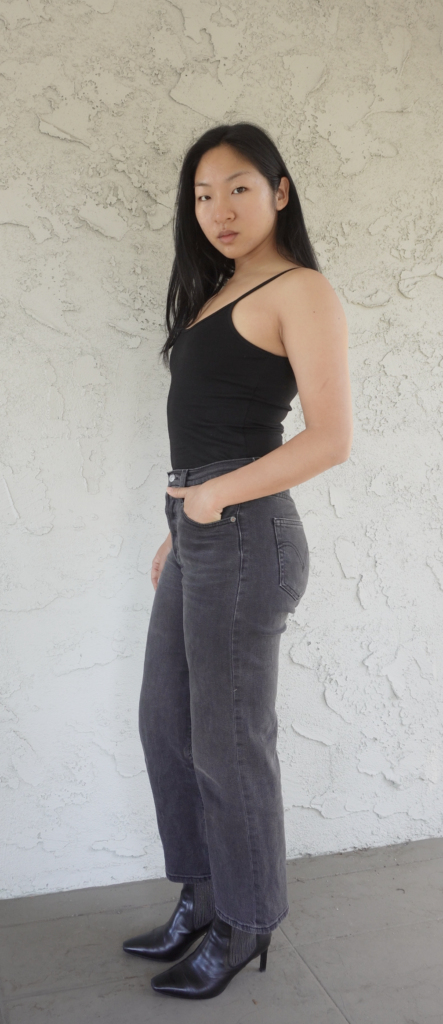
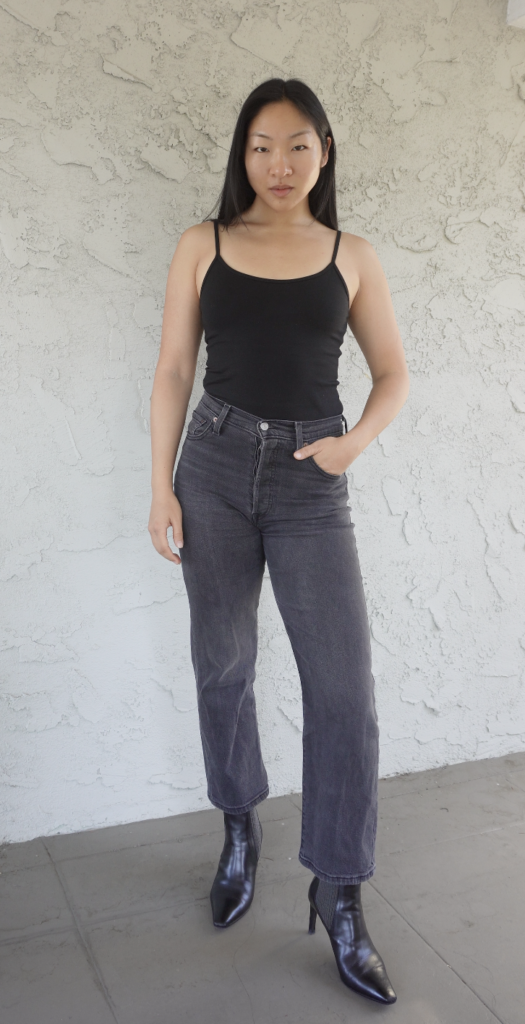
Full Body Shot: This shot shows your full body from head to toe. Make sure you’re not too far away from the camera.
Taking Digitals by Yourself
When taking digitals, I prefer taking them by myself. There isn’t too much variety to digitals, and at this point, I know my best angles and poses for digitals that make me feel the most comfortable. When I take them myself, I can check my angles and details to make adjustments accordingly. I don’t always feel comfortable sharing extensive feedback when a photographer (friend, family, or agent) takes my digitals.
Maybe I’m very particular, but modeling digitals are the one type of images I feel it’s really important for models to check and be happy with before moving onto the next look/pose. And if I can’t do that and ensure I am happy with the images, then I have found that my discomfort shows up very subtly in the images.
How to Take Your Digitals
I will share two ways I take digitals. I bought a very high-quality camera a few years back for my YouTube channel, which I use when I take digitals to submit to agencies. However, you can get signed with iPhone digitals as well, and that is the second way I’ll share. Take these images vertically, not horizontally.
Option 1: With a high quality camera
To be clear, you don’t need a high quality camera for digitals. I happen to have one, and this is my go-to option for my digitals.
I have the Sony ZV-E10 vlogging camera. Because it has high video quality, I set up my camera to record video as I stand in front of the lens and move through my poses.
When I process on my laptop, I will screenshot and crop the frames I like. Those are my digitals.
Option 2: With an iPhone
I have found that taking screenshots of my front facing iPhone 12 videos doesn’t cut it in terms of quality. Instead, when I take digitals on my iPhone, I use a self-timer app that takes multiple photos in succession.
The free app I use is Photo Timer+. It allows you to adjust variables like initial delay after pressing the shutter, number of images per set, and the interval of time in between shots.
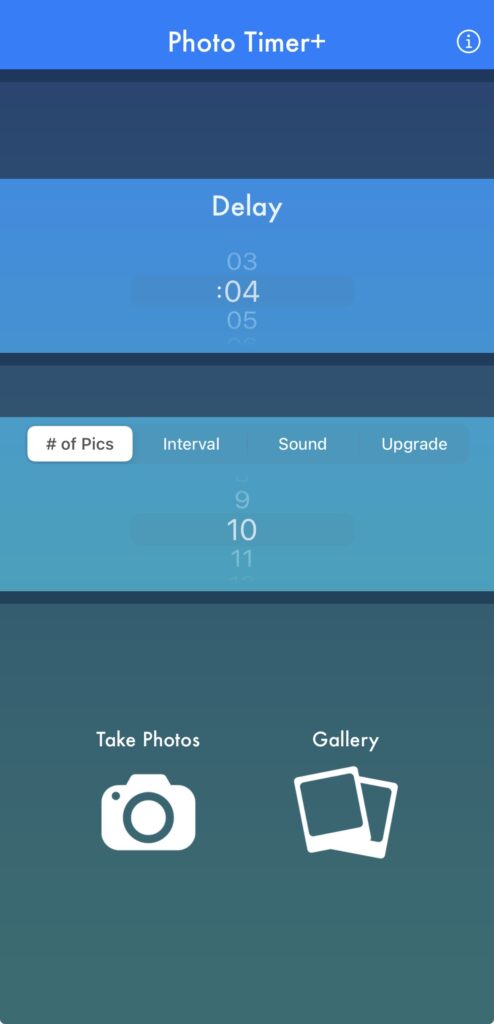
I usually start the setting with 10 pictures, and as the shutter goes off, I adjust my poses slightly to get different options. You can do this as many times as you need to until you find a shot that you are happy with.
Tripod Set up
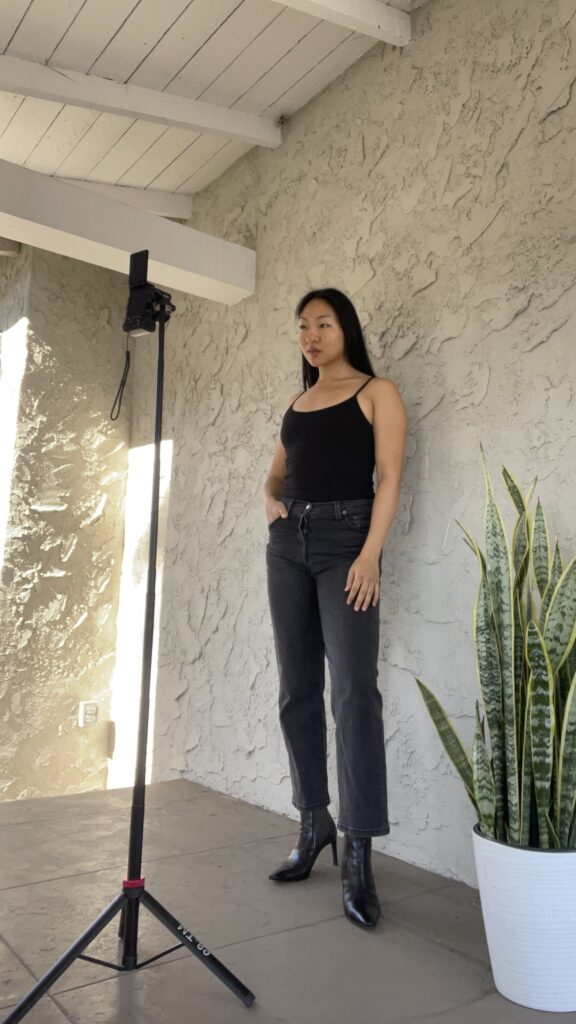
Experiment with the tripod height and camera angles for what you prefer with each polaroid shot. Here is how I set up my tripod for digitals.
For the Headshot:
I like setting the camera lense around nose level. I make sure there is about 1.5 – 2 ft distance between me and the camera. You may get more of your body in the shot, but it’s fine, because you can always crop the image to exclude what you don’t need. You should be looking directly into the camera.
Because the headshot is so tight to the face, many beginner models (aka me, when I first started) make the mistake of setting the camera too close to their face. This distorts your face. Make sure to crop the image instead. See below for what I’m referring to.

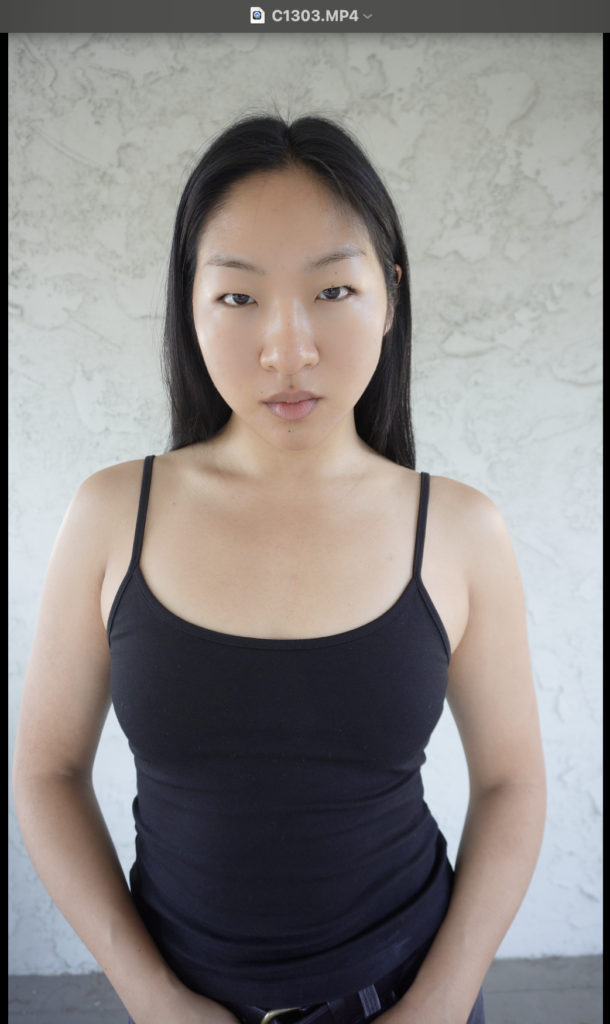
DO NOT DO THIS: This headshot image is taken too close to the camera. Step back and crop your photo instead.
Shoot the head profile and ¾ profile shot with this tripod setting, but angle your body accordingly.
For the Midshot:
For the midshot, I set the tripod to around collarbone height, and move the camera back to about 2.5 – 3 ft from my body. I will crop the image at around mid thigh.
For Full Body Shot:
The full body shot is a bit tricky, and this will require you to step back far enough to get your full head to toe in frame. I set my camera lens at about chest or waist level depending on how much space I have. I experiment with the angling of the camera so that I can fit my whole body in frame without too extreme of an upward or downward tilt.
Be careful not to set your camera too low and tilt up, otherwise you get an unflattering upward angle while you’re looking down. Ideally you want to be looking straight ahead.
Having enough space between you and the camera is really important here.
You can always crop the full body shot to exclude any
Practice makes perfect
If you don’t get signed with your first batch of digitals, just keep practicing. The more you take digitals, the better they become over time as you build confidence, master the right tripod heights, camera and body angles, and subtle facial expressions.
If you don’t get any interest from agencies in your first round of applications, wait 4 – 6 months, and apply again with new images. Once you’ve got a contract in hand, make sure you do your research and have clarity on everything in your modeling contract before you sign.


Leave a Reply